Rails App
Phase Six - Github
Github is a website for you to share your code with the world. We’ve
been using the git program to revise our code thus far, but right now
it’s only on our local computers. Github provides us with a simple way
to update and share our code with others. Remember, this is just the
source code, not the actual web application though. We’ll get to
deploying the application to the web later.
Since we already created Github accounts, all we need to do here is create a new repository and push our code to it.
Create a New GitHub Repository
- Go to the new repository page and give your project a name (e.g. scriba).
- Give your project a description and make it public.
- Do not select “Initialize this repository with a README”
Add the GitHub Remote
In the terminal, add a new remote for your repo (leave off the brackets around your username).
$ cd ~/projects/scriba
$ git remote add origin git@github.com:[username]/scriba.git
$ git remote -v
Push Your Code
Now you can “publish” the source code of your application.
$ git push -u origin masterDoes
git pushwork?
Create Issues
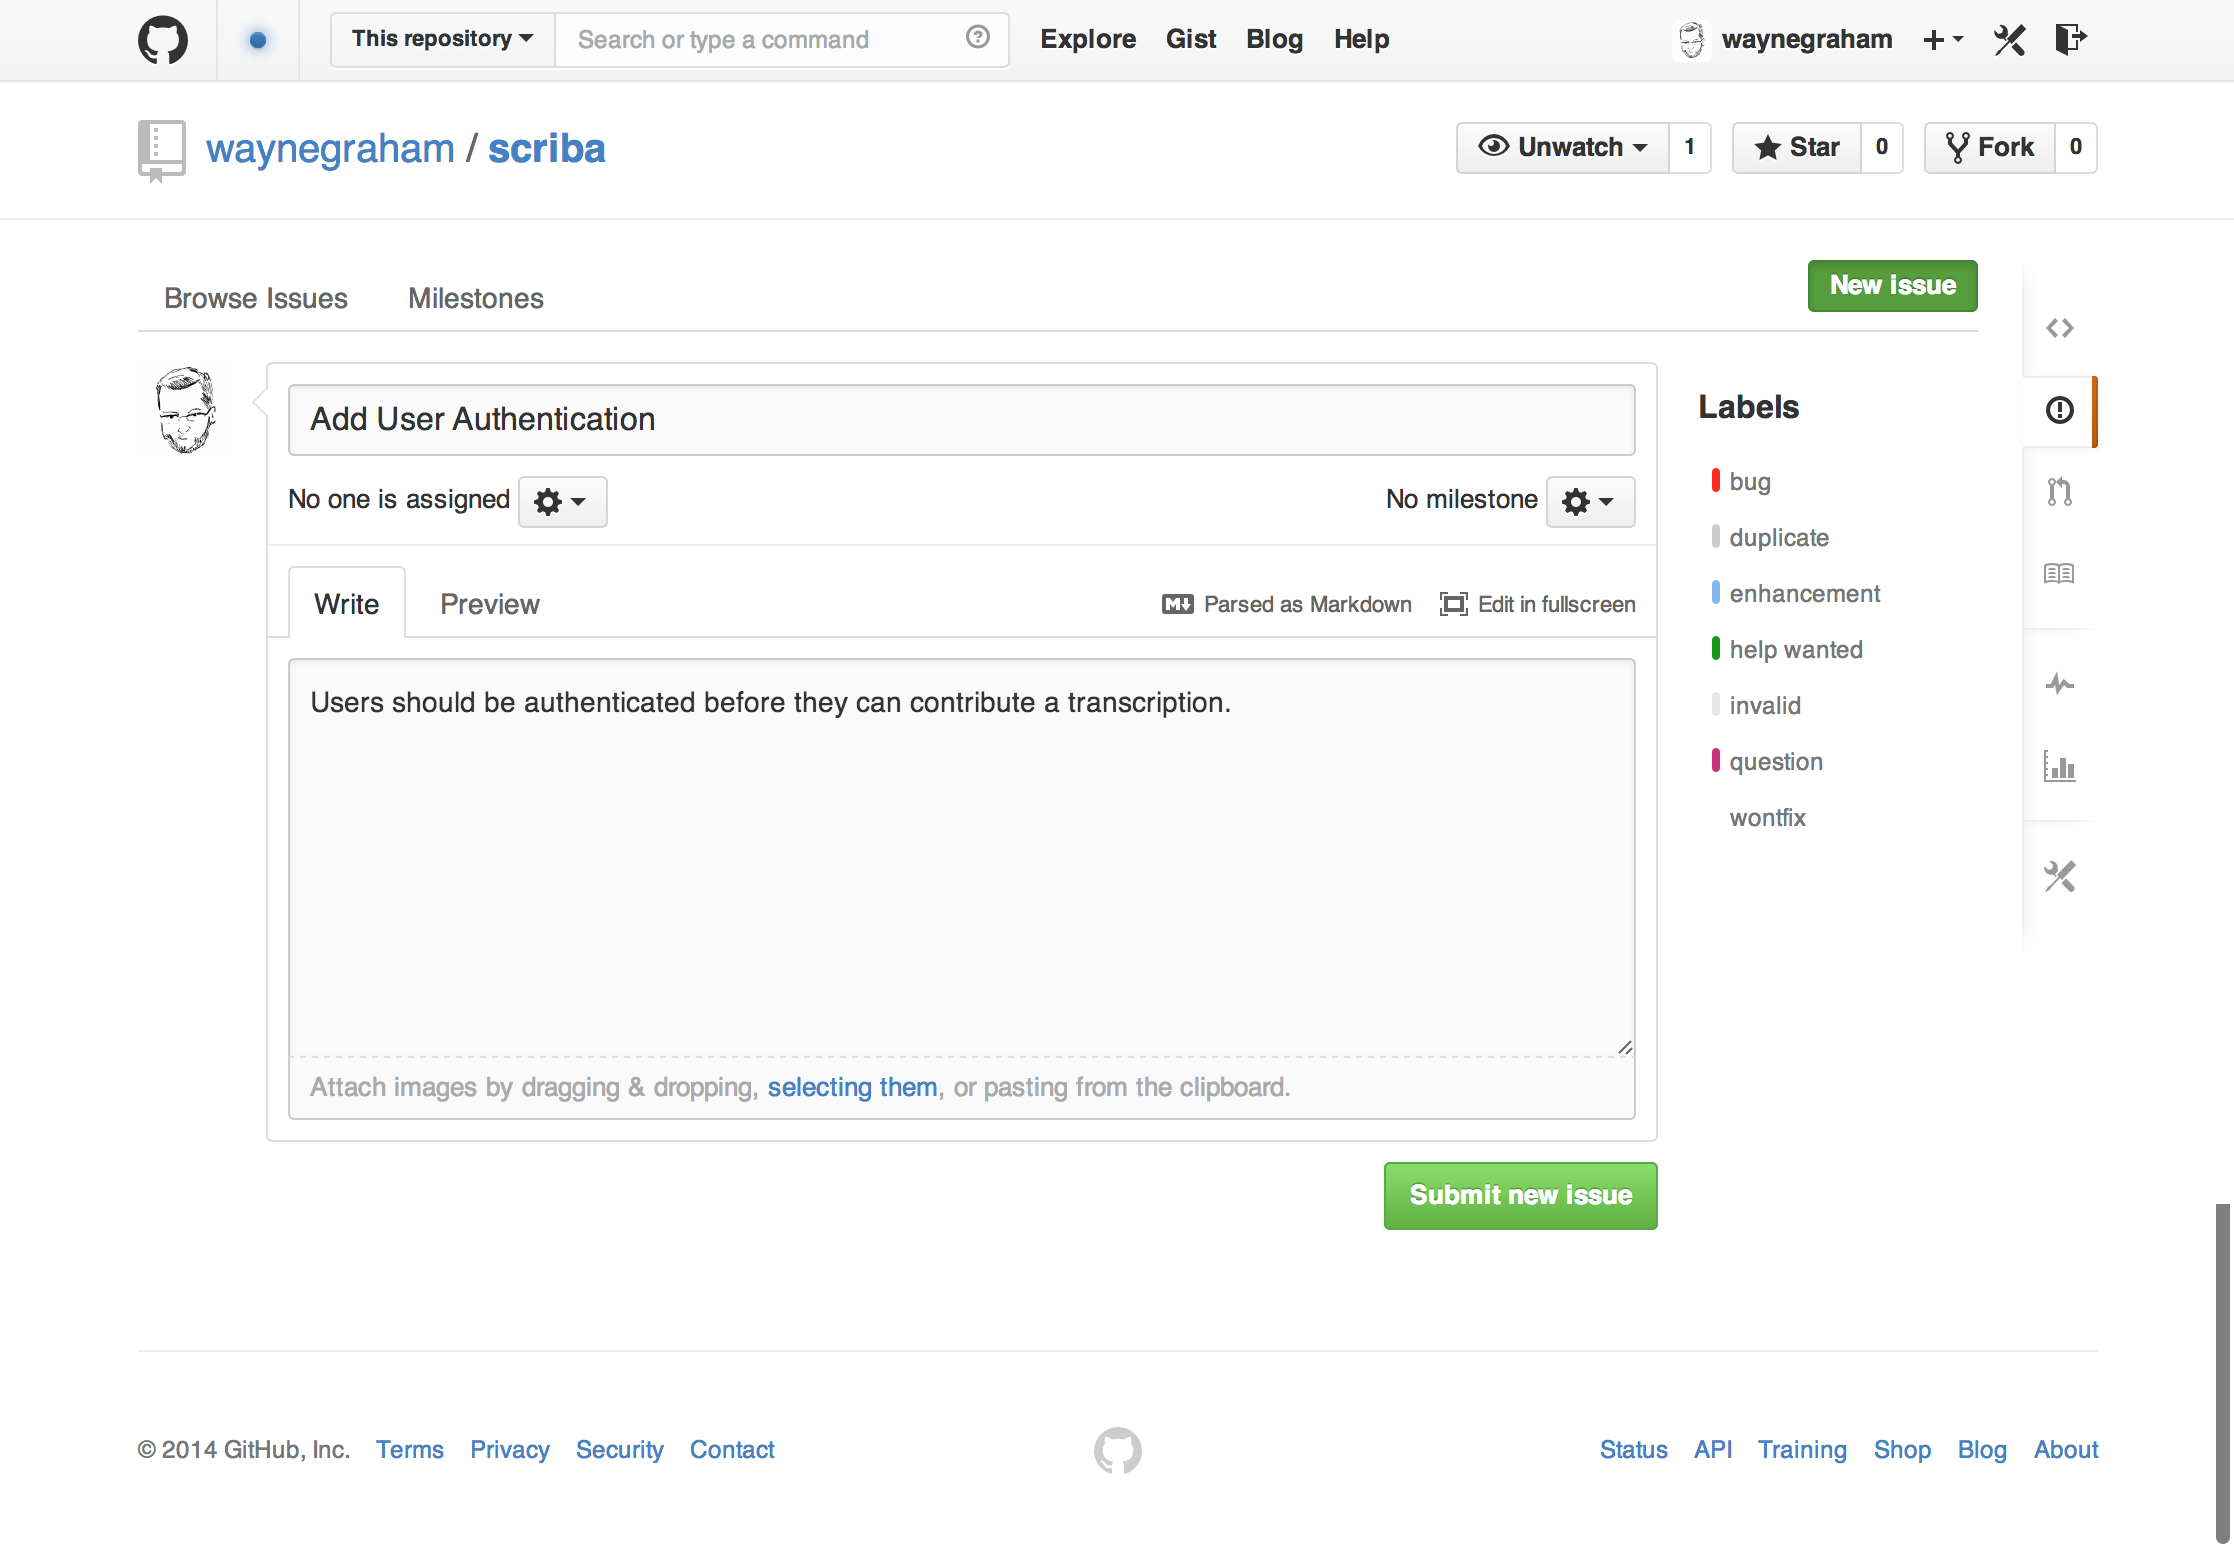
Go to your repo’s issue tracker at http://github.com/username/scriba/issues.
Add a new issue for your code to add users.
Title: Add User Authentication Comment: Users should be authenticated before they can contribute a transcription.
Working with the Issues Tracker
The issue tracker allows you not only to reference code in a commit, but also to close particular issues. We’ll use this to close issues in subsequent modules, but for now take a second to skim (not read) about this on the GitHub Help article Closing issues via commit messages.
For now we can create a new fake issue and close it. Create a new issue in the web interface to generate the Ruby documentation. After you create the issue, note the issue number (most likely #2). Back in your console, run the following task:
$ rake doc:appThis will create a new directory (doc/app) with all the code documentation
for the app. Now we can add it to the repository and close it.
$ git status
$ git add doc
$ git status
$ git commit -m "Adds documentation for the project. closes #2"
$ git push origin master
Now, go to the issue tracker for your project. Is the issue closed? What does it show?
Summary
In this exercise, we set up a new repository and added an exhisting git remote to it. We also set up issue/feature tracking, and used an awesome feature to work with the issue tracker directly from the commit messages. This is an exceptionally handy feature and helps you work with more than one person and track various ideas and bugs as they pop up.