Rails App
Phase Twelve - Continuous Integration
Running software on your computer is just one way to make sure your application is working properly. However, chances are, your computer is not a server, and there are a lot of different ways people might deploy your application. It’s a really good idea to have your tests run on a different server, maybe with different versions of Ruby or database backends.
Another “trick” we can do is if the tests pass on a server set up to run the tests, make it automagically deploy the update to the production server. This is called “Continious Deployment,” which aims to automate the software delivery process as much as possible. For this, we’ll use Github, Travis-ci, and our Heroku application.
Travis-ci Setup
First we need to set up our application to run with Travis by creating
.travis.yml in our project root. In that file, add the following:
language: ruby
bundler_args: --without production
rvm:
  - 2.0.0
  - 2.1.2
env:
  - DB=sqlite
  - DB=postgresql
before_script:
  - psql -c 'create database scriba_test' -U postgres
script:
  - RAILS_ENV=test bundle exec rake db:migrate --trace
  - bundle exec rake db:test:prepare
  - bundle exec rspec spec
Now, we can use our Github credential to create an account. Head to Travis-ci and click on the “Sign in with GitHub” link. Hover over your name, and click on “Accounts”. You’ll see a list of repositories and find yourname/scriba and set the selector to “on”.

Now we can add commit the .travis.yml to our repo.
$ git add .travis.yml
$ git commit -m "Add travis-ci configuration"
$ git push origin master
Now if you go to the Travis-ci site, you should see your tests running.
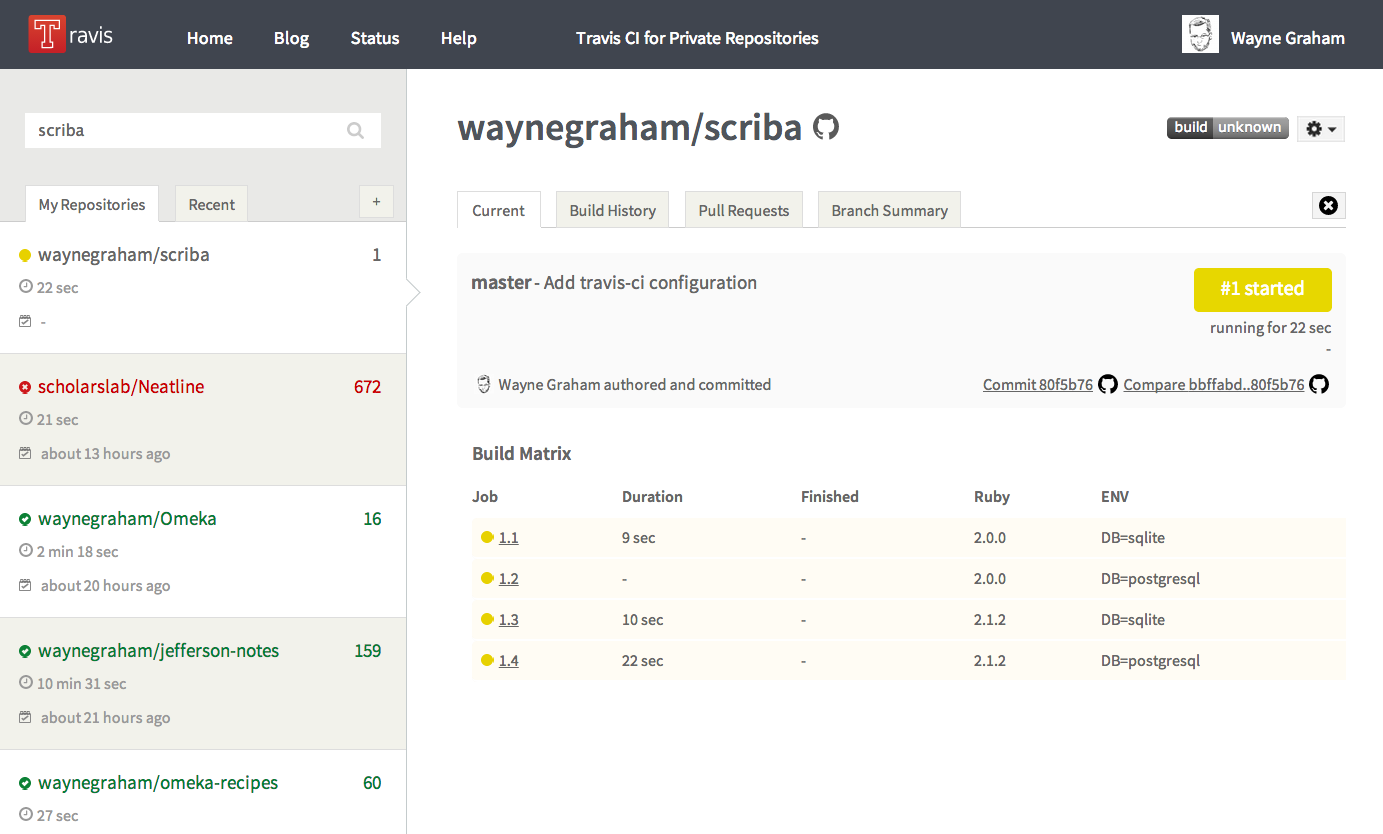
When all the tests are done, you’ll get an email letting you know the status (or you can just sit and watch it) as it can take a while.
Add a Badge
Click on the “build passing” image and a modal window will pop up with different options to embed the image in your app. Select “Rdoc” from the drop down menu and copy the contents of the text box.
![]()
Open your project’s README.rdoc file and paste the text you just copied on
line 2. Your file will look something like this:
== README
{<img src="https://travis-ci.org/waynegraham/scriba.svg?branch=master" alt="Build Status" />}[https://travis-ci.org/waynegraham/scriba]
Now if you add and commit those changes, then push them to Github, you should see on your project’s site the badge letting people looking at your site know your code is passing.
![]()
Oh yeah, you just triggered another build in Travis :)
Continous Deployment
To get our application to automatically deploy to the server when the tests pass, we first need to install the CLI for travis.
$ gem install travisNow we use travis to configure the actual deployment to heroku. Answer yes to
the two questions you’re asked (two additional questions are asked if you are running travis for the first time, answer yes to those as well).
$ travis setup heroku
Shell completion not installed. Would you like to install it now? |y|
Detected repository as waynegraham/scriba, is this correct? |yes|
Deploy only from waynegraham/scriba? |yes|
Encrypt API key? |yes|
This will add a new section to your .travis.yml file with something like the
following:
deploy:
  provider: heroku
  api_key:
    secure: Vc7g0vLxN2sQkNuq051NKV+5x13PIfhfp0aZcpTS7QdXCSgwAMj/0nNaBl1/rSDKJGa49QApzJqAoPMKp+kEqdujGaUt3v2R4p/mh9LpTdH5/YT8NJPkqC77WdW250toFg7+UAZJ4K2IRJBUHLbq/s0E4b2KbMo0zsEFkX5EQEk=
  app: shielded-temple-5358
  on:
    repo: waynegraham/scriba
Most of that is a bunch of scary keys to make sure only you (or the people on
your team) can trigger the deployment of the application. Now, add and commit
your changes, then push them to github. You can then monitor the activity on
the Travis-ci website by executing travis open.
Summary
We have gone through setting up an external continous integration server for the application, adding a badge that immediately tells us the status of the last build, and went even further by automating the deployment of the software when the tests pass. There can be some downsides to this style of deployment, however. You have to be exceptionally disciplined in writing tests that actually test the things in your application. If not, you can push code to a repository that breaks with a new feature that does not have a test associated and crash your application. You can recover from that though in heroku. Just in case this happens to you, here’s the command to roll back a deployment:
$ heroku rollbackThis will set the application back to a known state (the one before you broke it) to give you time to fix the bug you introduced.