Rails App - Creating Transcription Scaffold
Phase Two
In the previous exercise, we set up the project files for the scriba project. Now that we have learned a bit more about how Rails works, we’ll apply those lessons to our project to start building up the project.
And, as a crutch, don’t forget the Rails Beginner Cheatsheet.
Scaffold
We’re going to use Rails’ scaffolding functionality as a starting point for this application. This will generate all the necessary code for our CRUD operations (Create, Read, Update, and Delete).
For scriba we need to have a title, user_name, description, picture, and
transcription field. The title, user_name, and picture fields will be a
string and the description and transcription will be a text
data type.
$ bin/rails generate scaffold transcription title:string user_name:string picture:string description:text transcription:textYou will see a lot of output as Rails generates the files needed, including the views (for looking at the data), the files to tell the database what to do (the model), and the controller. There are also tests and other files that Rails will use to create CSS and JavaScript interactions as well as tests.
After these files are created, there is one additional step that you have to do if you add or change a model. We have to tell the database to update itself based on the change so it knows how to save the data.
$ bin/rake db:migrate
== 20140627192049 CreateTranscriptions: migrating =============================
-- create_table(:transcriptions)
   -> 0.0009s
== 20140627192049 CreateTranscriptions: migrated (0.0010s) ====================
Now that the database knows about the changes, we can start the web server up and see what happened.
$ bin/rails serverNow open your browser to http://localhost:3000.
What happened? Nothing has changed.
Ok, we’ll fix that later, but now point your browser to http://localhost:3000/transcriptions. You should see something like the following:
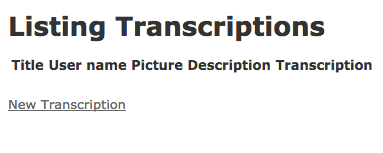
Click around in the site now and create a few transcriptions. When
you’re done, you can stop the server with ctrl-c.
Git
We have a working feature, so its a good time to check if there were new
files generated (there were), add them to git, and commit them to the
database.
$ git status
...
$ git add .
$ git commit -m "Added initial trascription scaffold"
Summary
We extended the application here with the Rails scaffold system to allow us to add/update/delete/view transcriptions that we create. We ran into some issues, for instance the default page is an info page without a lot of information in it, and right now, anyone can add transcriptions. Furthermore, let’s face it, the CSS looks a bit, well, blah. We’ll start working on these issues in the next module.
You may have also noticed that we’ve managed to build a web application, up to this point, without ever actually opening a text editor. We’ve relied pretty heavily on the conventions and generators that Rails provides for us to build a functioning web application. Don’t worry, we’ll be getting into the code very soon.